Showing posts with label Tutorial. Show all posts

Thursday, September 02, 2010

Return Email Unread To A Single User

This week I had a person very close to me start receiving abusive emails from a family member. This friend asked me if there was a way to block email from that particular user without changing the email address completely. Although I first told the person, "no, it's not possible." After a little work inside the powerful Gmail program by Google I was able to relieve this person with the information that blocking mail from a single user is possible. I wanted to detail the process below, to allow others to use this amazing feature without giving up their current email address, even if they are not currently Gmail users.

If your email address is already hosted by Gmail skip to step 4.

Step 1 - Signup for a Gmail account. If you have a smart phone and your current email is with your ISP (@comcast, @att.net, @sbcglobal.net) this process will add a second benefit to you by enabling IMAP which is better understood as email synching.

Step 2 - In Settings dashboard of your new Gmail account go to the accounts tab go to the row titled 'Check Mail Using Pop3' and click on "Add a mail account you own" button to enter the account information for your current email address.
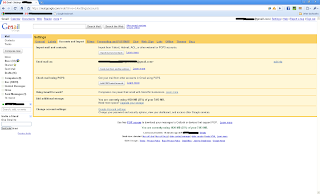
Step 3 - While still remaining in the accounts tab of the Settings dashboard find the 'Send Mail As' row and click the 'Send Mail From Another Address' button to complete the steps contained there to enable you to continue sending mail using your existing email address.
Step 4 - Change the settings in your email client (Thunderbird, Outlook, etc) and on your phone to check Gmail rather than checking your ISP directly.
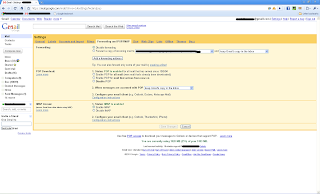

Now we are ready to setup the mail return inside Gmail.

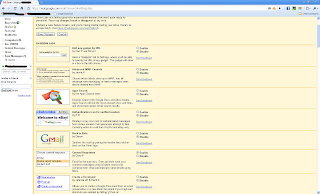
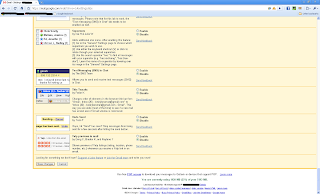
Step 5 - Under the Labs tab in the Settings menu enable "Canned Responses." After hitting the radio button to 'enable' make sure you navigate to the bottom of the page and save changes.
Step 6 - Using the 'Compose Mail' button open a new mail pane. Do not worry about a To: or a Subject: since you are just using the type to create the text of your response to the offending email sender. I used "Your message has been returned unopened. This user is not accepting messages from you at this time." as the automated response, but you can type any text you would like here.
Step 7 - Use the 'Canned Responses' button that has now appeared under your subject box to 'Save New Canned Response.' Give this response a name in the dialog box that opens and choose save. Exit 'Compose' window by using the 'Discard' button.
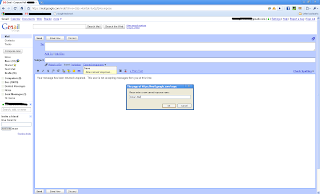
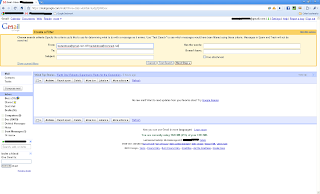
Step 8 - Near the search box at the top of the page use the link to 'Create a Filter.' This opens the 'Filters' tab in the Settings dashboard. Select 'Create a Filter.' In the From: box add the offending email address. If the offending party has multiple email accounts enter each in the From: box separated by an OR in caps. Proceed to next step by clicking the 'Next Step' button.
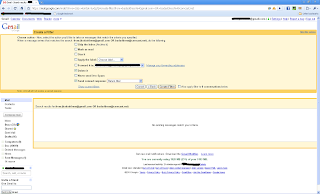
Step 9 - In this final step you will tell the Gmail filter how to respond when an email arrives from the chosen From address(es). You should check the box to 'Delete It' and the box to 'Send Canned Response' selecting the response created in Step 8. Select Create Filter and you are finished.

I hope that this tutorial helps others in the way I was able to help protect my friend.

Monday, November 03, 2008

Webkinz Autologin

I have two children who are avid Webkinz users. However I am often bothered by the fact that I have to come log them into the system, and if they get booted, I have to come repeat the process again. So today as I was working on some Windows automation stuff for a work project, I decided to see if I could write a small Automation script for an autologin to Webkinz.

So here is my tutorial to how to use this.

Step 1: Download and Install auto-hotkey. Don't worry about the name, we are creating a shortcut not a hot key.

Step 2: Open Autoscriptwriter (recorder) which should be under your start menu. and copy the following text into the run line:

FIREFOX
C:\Program Files\Mozilla Firefox\firefox.exe http://mci2.webkinz.com/loader4.php?go=loadReturnUser&aol=0&fs=0
INTERNET EXPLORER
C:\Program Files\Internet Explorer\iexplore.exe http://mci2.webkinz.com/loader4.php?go=loadReturnUser&aol=0&fs=0
Step 3: Click the red Record button and after the login Window opens, Click on the Username field and type in your child's username. Then TAB down to the Password field to type in your child's password. Finally, click on the Begin Playing button using your mouse.

Step 4: In your upper left hand corner is a stop button. Click stop and wait for the generated script to appear.
Delete any extra code from bottom after your mouse click, that may have been generated while waiting for page to load. Change Sleep value from 100 to 1000. Your script should look almost identical to this one, with only the "mouseclick" coordinates being different for your screen, and the username and password belonging to your child.

FIREFOX
Run, C:\Program Files\Mozilla Firefox\firefox.exe http://mci2.webkinz.com/loader4.php?go=loadReturnUser&aol=0&fs=0
WinWait, Welcome to Webkinz® - a Ganz website - Mozilla Firefox,
IfWinNotActive, Welcome to Webkinz® - a Ganz website - Mozilla Firefox, , WinActivate, Welcome to Webkinz® - a Ganz website - Mozilla Firefox,
WinWaitActive, Welcome to Webkinz® - a Ganz website - Mozilla Firefox,
MouseClick, left, 504, 487
Sleep, 1000
Send,
username{TAB}password
Sleep, 1000
MouseClick, left, 504, 607

INTERNET EXPLORER
Run, C:\Program Files\Internet Explorer\iexplore.exe http://mci2.webkinz.com/loader4.php?go=loadReturnUser&aol=0&fs=0
WinWait, Welcome to Webkinz® - a Ganz website - Windows Internet Explorer,
IfWinNotActive, Welcome to Webkinz® - a Ganz website - Windows Internet Explorer, , WinActivate, Welcome to Webkinz® - a Ganz website - Windows Internet Explorer,
WinWaitActive, Welcome to Webkinz® - a Ganz website - Windows Internet Explorer,
MouseClick, left, 836, 449
Sleep, 1000
Send,
username{TAB}password
Sleep, 1000
MouseClick, left, 836, 567
Step 5: Save file to Desktop as Webkinz.ahk and close Autoscriptwiter.

Step 6: Teach child to double click icon to go into Webkinz World.