If your email address is already hosted by Gmail skip to step 4.
Step 1 - Signup for a Gmail account. If you have a smart phone and your current email is with your ISP (@comcast, @att.net, @sbcglobal.net) this process will add a second benefit to you by enabling IMAP which is better understood as email synching.
Step 2 - In Settings dashboard of your new Gmail account go to the accounts tab go to the row titled 'Check Mail Using Pop3' and click on "Add a mail account you own" button to enter the account information for your current email address.
 Step 3 - While still remaining in the accounts tab of the Settings dashboard find the 'Send Mail As' row and click the 'Send Mail From Another Address' button to complete the steps contained there to enable you to continue sending mail using your existing email address.
Step 4 - Change the settings in your email client (Thunderbird, Outlook, etc) and on your phone to check Gmail rather than checking your ISP directly.

Now we are ready to setup the mail return inside Gmail.
Step 5 - Under the Labs tab in the Settings menu enable "Canned Responses." After hitting the radio button to 'enable' make sure you navigate to the bottom of the page and save changes.


Step 6 - Using the 'Compose Mail' button open a new mail pane. Do not worry about a To: or a Subject: since you are just using the type to create the text of your response to the offending email sender. I used "Your message has been returned unopened. This user is not accepting messages from you at this time." as the automated response, but you can type any text you would like here.
Step 7 - Use the 'Canned Responses' button that has now appeared under your subject box to 'Save New Canned Response.' Give this response a name in the dialog box that opens and choose save. Exit 'Compose' window by using the 'Discard' button.

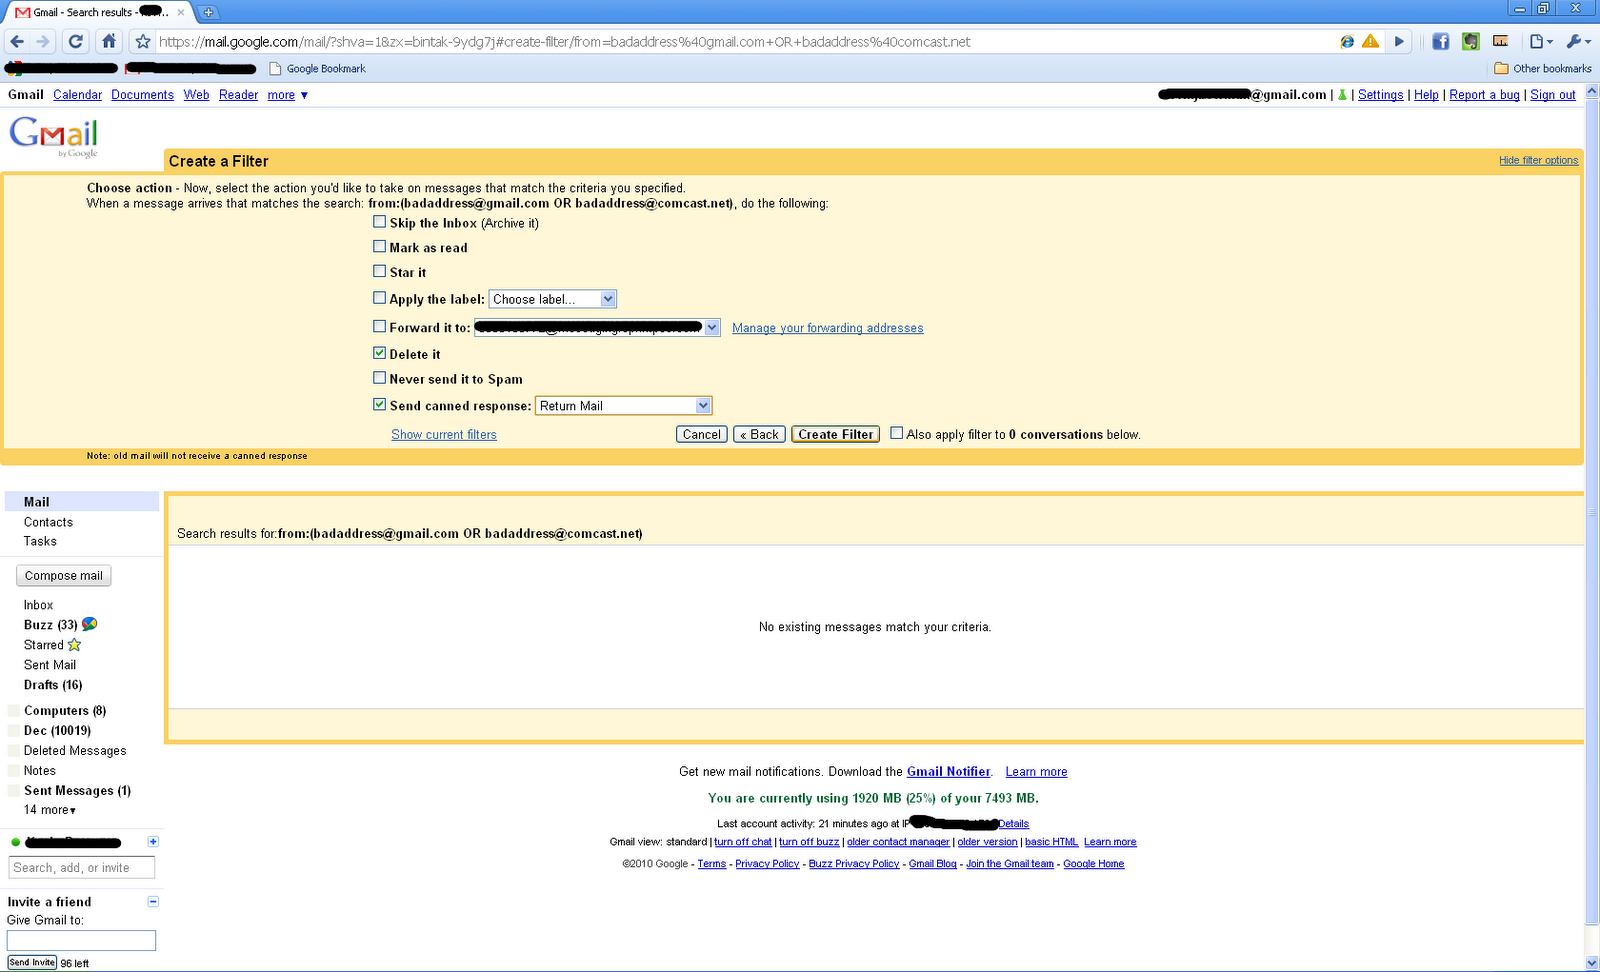
Step 8 - Near the search box at the top of the page use the link to 'Create a Filter.' This opens the 'Filters' tab in the Settings dashboard. Select 'Create a Filter.' In the From: box add the offending email address. If the offending party has multiple email accounts enter each in the From: box separated by an OR in caps. Proceed to next step by clicking the 'Next Step' button.

Step 9 - In this final step you will tell the Gmail filter how to respond when an email arrives from the chosen From address(es). You should check the box to 'Delete It' and the box to 'Send Canned Response' selecting the response created in Step 8. Select Create Filter and you are finished.
I hope that this tutorial helps others in the way I was able to help protect my friend.